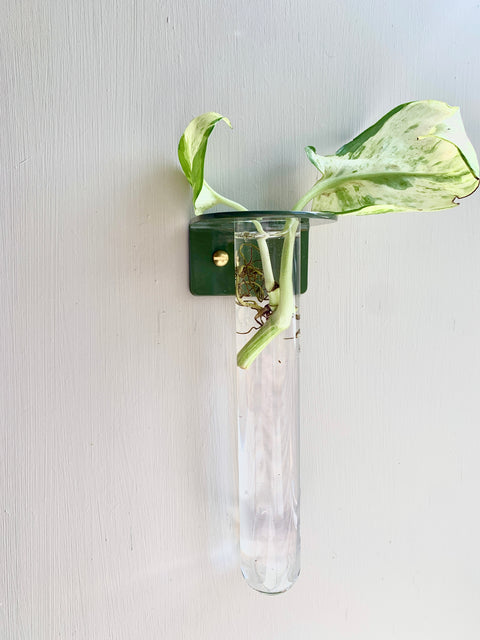

Single Wall mounted Propagation Station - Olive
Wall mounted Propagation station in Olive.
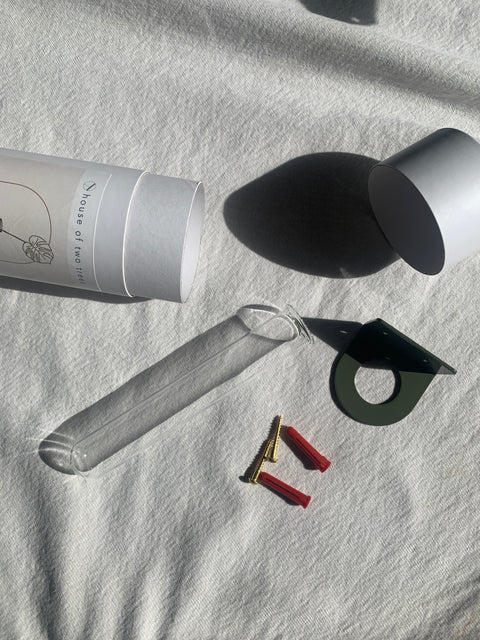
Tube includes
1 x Wall bracket
1 x 24mm x 150mm Test Tube
2 x Solid Brass Slot Screws
2 x Red Rawl Plugs
Fixing Steps
- Firstly, decide whether which way you would like the bracket.
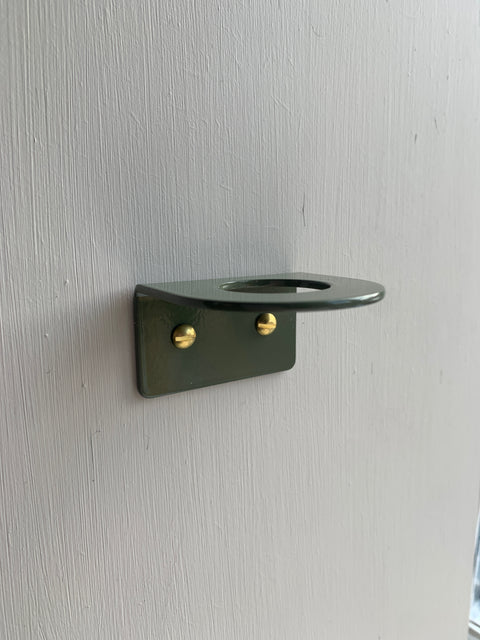
- Place the bracket to the wall/Surface ensuring it is level and mark the wall where the fixing holes are.
- Remove the bracket. Using a 5 drill bit drill two holes deep enough for the Rawl plug.
- Once drilled push a Rawl plug into each hole (you may need to use a hammer to lightly tap into place) Ensure that the Rawl Plug is flush with the wall/Surface.
- Line the bracket with the holes and slowly screw them in with a flat head screw driver. Do not use a drill or imact driver as this can break the screw or you may slip and mark the bracket.
- Once fixed remove the tissue from the test tube and feed through the bracket.
- Now you are ready to fill with water or soil :)